
Many of us like to write in Markdown when writing draft work. It allows you to work without complicated formatting but still apply styles such as bold or italic. This is done using tags like # to denote titles or surrounding phrases with * to denote bold, italic or bold italic.
Unfortunately, Affinity Publisher doesn’t (currently) support importing files in Markdown. However, it’s the work of a few minutes with search and replace and the correct terms. Here’s how to import Markdown and still keep all your styles.
1. Save your Markdown file as filename.txt.
(Publisher won’t import *.md). You can just rename it with a .txt extension in the file manager if you want..
2. Import into text frame.
Select an empty text frame, go File > Place… and select the file.

3. Get rid of double spaces.
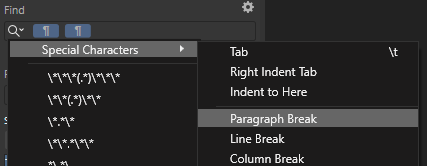
Markdown uses double spaces to make a new paragraph, Publisher does that automatically. Go to Text > Find and in the dropdown with the magnifying glass, select Special Characters > Paragraph Break. Do this twice in Find and once in Replace, so that double spaces become single.

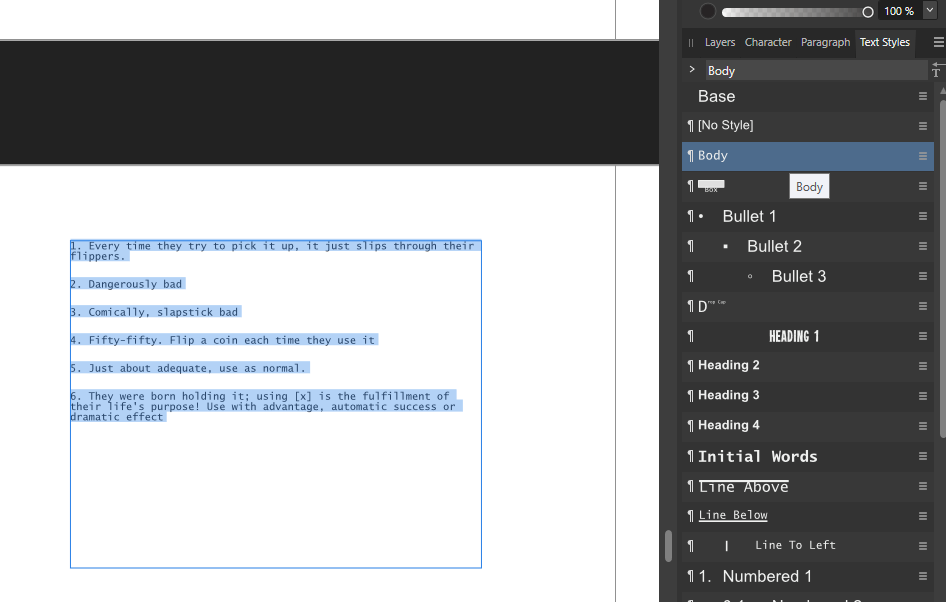
5. Set everything to Body.
This ensures that everything that doesn’t end up formatted with something else has a base paragraph style of “body”. Feel free to use a different base if you prefer. Sometimes text frames can be weird and set everything imported to the last style you used – this step prevents all your text being paragraph styled as Heading2 or similar.
- Use Ctrl+Alt and then select “Body” in the Text Styles dialog.
5. Turn on Regular Expressions.
This is the magic you need to make our searches work. Go to the Settings Cog > and tick Regular Expression for both the Find and Replace inputs.

6. Replace Headings.
Markdown uses “# Text” to make Titles. The more # marks, the smaller the size of the title. So “### Title” will be a small Heading 3, and “# Title” will be a large Heading 1. Replacing in reverse order with #### tags before ### will prevent high level tags being picked up and classed as the lower tag with a “#” in the free text.
- Find “\#\#\#\#\s” and replace with “$1” and set Formatting > Paragraph Style > Heading 4. This will find the “#### ” (the /s picks up the space between the letters), and change the style whilst deleting the hash marks:
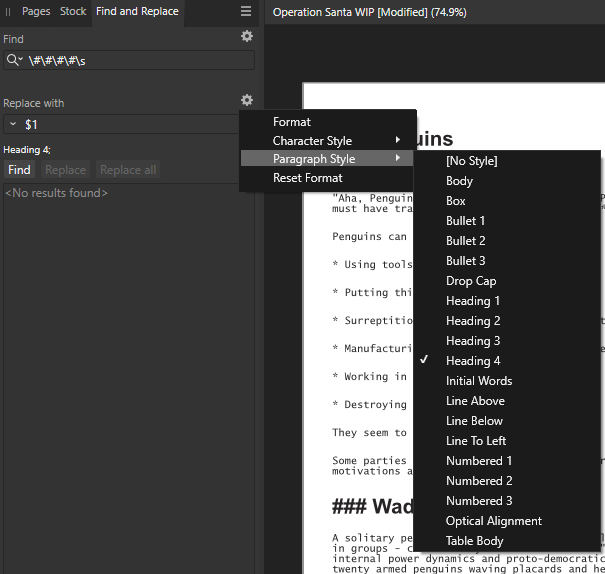
Do the same with the other tags in the order below:
- Find “\#\#\#\s” and replace with “$1” and set Formatting > Paragraph Style > Heading 3.
- Find “\#\#\s” and replace with “$1” and set Formatting > Paragraph Style > Heading 2.
- Find “\#\s” and replace with “$1” and set Formatting > Paragraph Style > Heading 1.
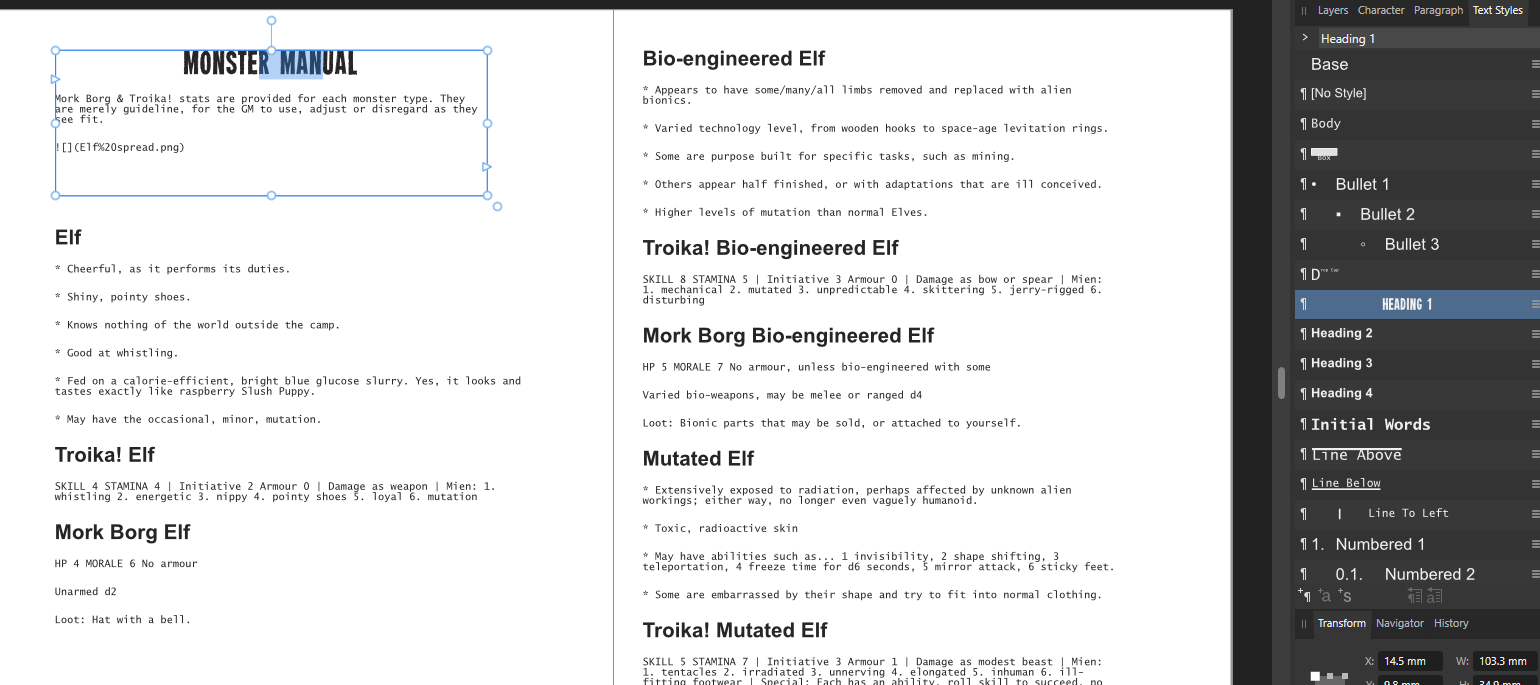
All your Titles should have appeared now like so:
8. Replace Bold & Italics.
Our regular expression this time will search for asterisks * and select the text between them. Again, do this in reverse order to catch *** first, then **, then *:
- Find “\*\*\*([^\s].+?)\*\*\*” and replace with “$1” and Format > Character Style > Strong Emphasis.

Do the same for Bold and Italic:
- Find “\*\*([^\s].+?)\*\*” and replace with “$1” and Format > Character Style > Strong.
- Find “\*([^\s].+?)\*” and replace with “$1” and Format > Character Style > Emphasis.
It should now look like this:

8. Replace Bullets.
You’ll need to repeat this for every level of bullets you have, from *** to *.
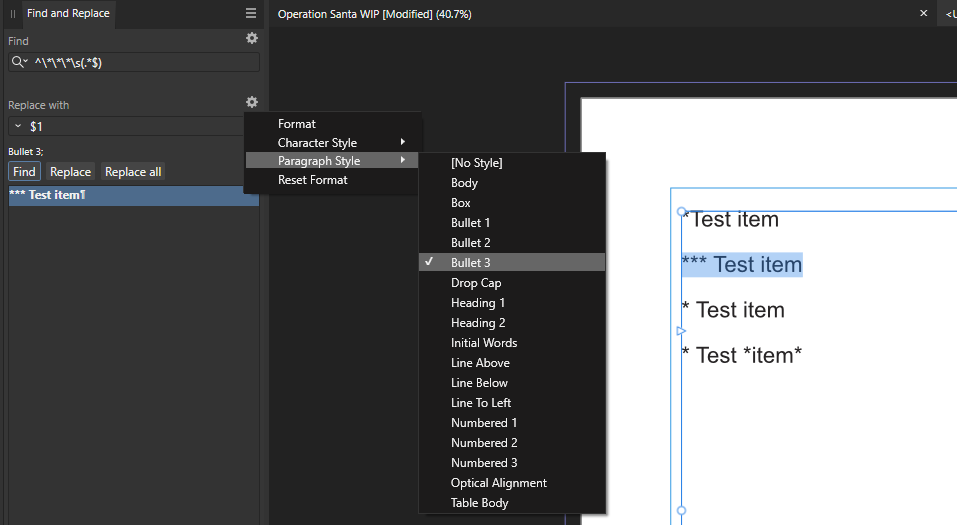
- Find “^\*\*\*\s(.*$)” and replace with “$1” and Format > Paragraph Style > Bullet 3
Do the same for Bullet 2 and Bullet 1
- Find “^\*\*\s(.*$)” and replace with “$1” and Format > Paragraph Style > Bullet 2
- Find “^\*\s(.*$)” and replace with “$1” and Format > Paragraph Style > Bullet 1
9. Replace Numbers
Numbered lists in markdown are done manually rather than automatically. Hunting for them involves searching for a number and a fullstop at the start of a line – so it might break things if that has been done at the start of a line but not actually intentionally in a numbered list.
- Find “^[\d]+\.\s(.*$)” and replace with “$1” and Format > Paragraph Style > Numbered 1.

Finished!
That’s all for now! At some point I’ll make some kind of macro to do it automatically, but there isn’t capacity in Publisher for this at the moment. Shout out to Regexr – a live Regex playground which helped me understand Regex for the first time in a decade of using it – for helping me put this together!
The above, step by step, takes about two minutes. I’ve included it below again without explanation so you can just whizz through it;
- Set everything to “body”
- Get rid of double spaces. Go to Text > Find and in the dropdown with the magnifying glass, select Special Characters > Paragraph Break. Do this twice in Find and once in Replace, so that double spaces become single.
- Turn on Regular Expressions. This is the magic you need to make our searches work. Go to the Settings Cog > and tick Regular Expression for both the Find and Replace inputs.
- Find “\#\#\#\#\s” and replace with “$1” and set Formatting > Paragraph Style > Heading 4.
- Find “\#\#\#\s” and replace with “$1” and set Formatting > Paragraph Style > Heading 3.
- Find “\#\#\s” and replace with “$1” and set Formatting > Paragraph Style > Heading 2.
- Find “\#\s” and replace with “$1” and set Formatting > Paragraph Style > Heading 1.
- Find “\*\*\*([^\s].+?)\*\*\*” and replace with “$1” and Format > Character Style > Strong Emphasis.
- Find “\*\*([^\s].+?)\*\*” and replace with “$1” and Format > Character Style > Strong.
- Find “\*([^\s].+?)\*” and replace with “$1” and Format > Character Style > Emphasis.
- Find “^\*\*\*\s(.*$)” and replace with “$1” and Format > Paragraph Style > Bullet 3
- Find “^\*\*\s(.*$)” and replace with “$1” and Format > Paragraph Style > Bullet 2
- Find “^\*\s(.*$)” and replace with “$1” and Format > Paragraph Style > Bullet 1
- Find “^[\d]+\.\s(.*$)” and replace with “$1” and Format > Paragraph Style > Numbered 1.

Great hack, thank you!